
Hi! Monday is here and that means the start of a new week of bingo challenges! I wonder if someone will have Bingo this week? You never know! Today's game involves more words - a BONUS-BONUS words section, and extra opportunities to win entries in the question area.
And in case you even care (giggle), this quote describes me perfectly!

 |
| Intense Teal Sparkle N Soft - how gorgeous! |
If you were unable to create a bingo “card” prior to the deadline, you may still play and become eligible for one of the weekly prizes. Click here for how to play without a card (see No Bingo Card? And Weekly)
 |
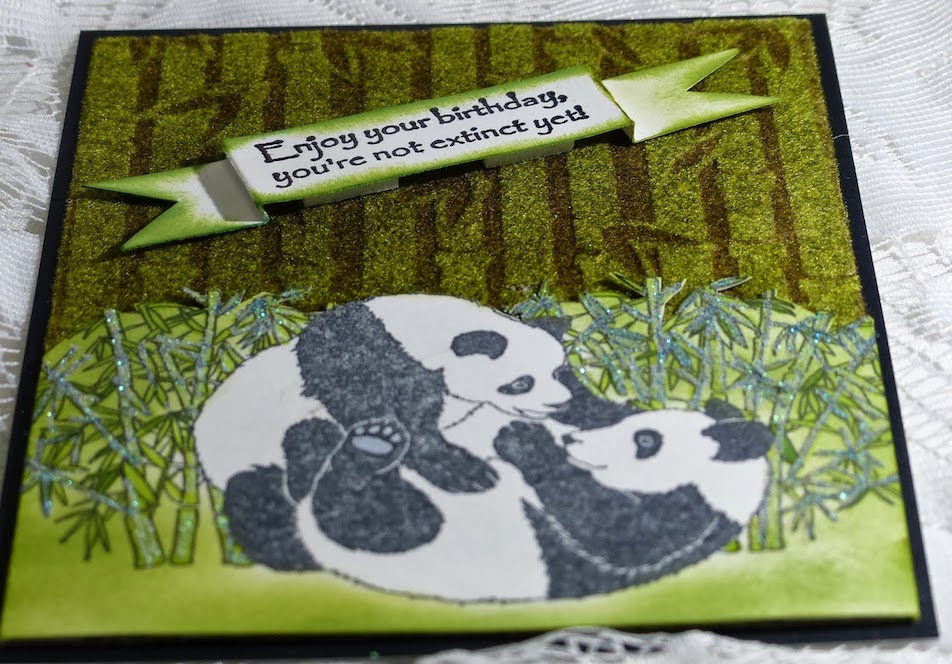
| This photo is large so its fuzzy dimension can be easily seen! Made with bamboo embossing folder, Palm Leaf Flocking, and Memento Rich Cocoa Ink. |
Today's words are:
- 163 Snowflake (BONUS WORD)
- 181 Ornament Glue (BONUS WORD)
- 43 Dress Up (BONUS WORD)
- 76 Flowers
- 120 Mesmerized (BONUS WORD)
- 103 Cappuccino (BONUS WORD)
- 27 Heart
- 17 Frogs (BONUS WORD)
- 75 Lavender (BONUS WORD)
- 186 Medallion
- 148 Daisy (BONUS WORD)
- 164 Get Well (BONUS WORD)
- 24 Jewelry (BONUS WORD)
BONUS WORD TIME!
- If you have 7 of the bonus words, receive an extra THIRTY entries for the drawing this Saturday!
- If you have 8 of the 10 bonus words in your list today, receive an extra FIFTY entries for the drawing this Saturday!
- If you have ALL TEN of the bonus words, receive 150 extra entries for Saturday's drawing + you can choose how you want the 150 divided up - a little each day or all in one day.
- Be sure to send an email to SNS_Bingo@tampabay.rr.com with your name in the Subject Sentence followed by the date of the challenge questions.
 |
| Again, the photo is large so the details can be more easily seen. More info for this card here. |
Shona discovered that the light colors of Flocking are SEMI-TRANSPARENT, and that the darker colors are SEMI-OPAQUE, meaning that the lighter colors can be seen through, and that the darker colors can also be seen through just a little bit, depending on the application. More on that later.
 |
| Both of these puppies are flocked on top of WHITE cardstock - see how the white shows through a little? Card details here. |
The gist of the technique is:
- Place 2.5" Tear-ific Tape or Super Adhesive Sheets on cardstock.
- Trim to desired size.
- Pull off protective layer and burnish in flocking.
- Place flocked side up on one side of the embossing folder.
- Close Folder.
- Run through machine.
But in order to answer your questions today, you'll need to look at the fabulous photos and explanation that Shona has provided in the SNS Tips and Techniques Section.
 |
| Mary's Sample shows a panel made with Flocking without any dry embossing - it still makes a beautiful background. |
1) (1 entry) Is it possible to create an embossed, flocked background without using ink on your embossing folder?
2) (up to 3 entries) Why do you think it is important to burnish the flocking into the adhesive prior to using the embossing folder?
3) (1 entry) True or False - you can only use light color flocking for Shona's embossed flocking technique.
4) (up to 3 entries) Why do you think it is preferable to apply the flocking into the adhesive prior to embossing it, rather than after dry embossing the panel?
5) (1 entry) What type of ink is suggested for this technique - dye base or pigment base?
6) (3 entries) Hint: see the pinky-purple sample under TIPS in Shona's tutorial. Even though the same colors of flocking and ink were used on both samples, why are the two finished panels different?
7) (1 entry) More than one color of Flocking can be used on a project with this technique. What colors were used on the sample Shona shared?
8) (1 entry) Do you already own some flocking so you can try this technique?
9) (6 entry) Do you prefer the results better with the sticker paper, or the Super Adhesive Sheets? Why?
Good Luck, everyone!
hugs,

No comments:
Post a Comment